
Displaying Data 6.0
You can display data by binding controls in an HTML template to properties of an Angular component.
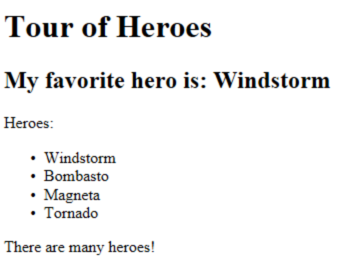
In this page, you’ll create a component with a list of heroes. You’ll display the list of hero names and conditionally show a message below the list.
The final UI looks like this:
The live example (view source) demonstrates all of the syntax and code snippets described in this page.
Showing component properties with interpolation
The easiest way to display a component property
is to bind the property name through interpolation.
With interpolation, you put the property name in the view template, enclosed in double curly braces: {{myHero}}.
Follow the setup instructions for creating a new project
named displaying_data.
Then modify the app_component.dart file by
changing the template and the body of the component.
When you’re done, it should look like this:
lib/app_component.dart
import 'package:angular/angular.dart';

@Component(
  selector: 'my-app',
  template: '''
    <h1>{{title}}</h1>
    <h2>My favorite hero is: {{myHero}}</h2>
  ''',
)
class AppComponent {
  final title = 'Tour of Heroes';
  String myHero = 'Windstorm';
}
You added two properties to the formerly empty component: title and myHero.
The revised template displays the two component properties using double curly brace interpolation:
template: '''
  <h1>{{title}}</h1>
  <h2>My favorite hero is: {{myHero}}</h2>
''',
Angular automatically pulls the value of the title and myHero properties from the component and
inserts those values into the browser. Angular updates the display
when these properties change.
More precisely, the redisplay occurs after some kind of asynchronous event related to the view, such as a keystroke, a timer completion, or a response to an HTTP request.
Notice that you don’t call new to create an instance of the AppComponent class.
Angular is creating an instance for you. How?
The CSS selector in the @Component annotation specifies an element named <my-app>.
That element is a placeholder in the body of your index.html file:
web/index.html (body)
<body>
  <my-app>Loading...</my-app>
</body>
When you launch your app with the AppComponent class (in web/main.dart), Angular looks for a <my-app>
in the index.html, finds it, instantiates an instance of AppComponent, and renders it
inside the <my-app> tag.
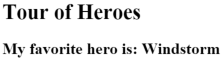
Now run the app. It should display the title and hero name:
Template inline or template file?
You can store your component’s template in one of two places.
You can define it inline using the template property, or you can define
the template in a separate HTML file and link to it in
the component metadata using the @Component annotation’s templateUrl property.
The choice between inline and separate HTML is a matter of taste, circumstances, and organization policy. Here the app uses inline HTML because the template is small and the demo is simpler without the additional HTML file.
In either style, the template data bindings have the same access to the component’s properties.
Showing a list property with *ngFor
To display a list of heroes, begin by adding a list of hero names to the component and redefine myHero to be the first name in the list.
lib/app_component.dart (class)
class AppComponent {
  final title = 'Tour of Heroes';
  List<String> heroes = [
    'Windstorm',
    'Bombasto',
    'Magneta',
    'Tornado',
  ];
  String get myHero => heroes.first;
}
Now use the Angular ngFor directive in the template to display
each item in the heroes list.
lib/app_component.dart (template)
template: '''
  <h1>{{title}}</h1>
  <h2>My favorite hero is: {{myHero}}</h2>
  <p>Heroes:</p>
  <ul>
    <li *ngFor="let hero of heroes">
      {{ hero }}
    </li>
  </ul>
''',
This UI uses the HTML unordered list with <ul> and <li> tags. The *ngFor
in the <li> element is the Angular “repeater” directive.
It marks that <li> element (and its children) as the “repeater template”:
<li *ngFor="let hero of heroes">
  {{ hero }}
</li>
Don’t forget the leading asterisk (*) in *ngFor. It is an essential part of the syntax.
For more information, see the Template Syntax page.
Notice the hero variable in the ngFor instruction;
it is an example of a template input variable. Read
more about template input variables in the microsyntax section of
the Template Syntax page.
Angular duplicates the <li> for each item in the list, setting the hero variable
to the item (the hero) in the current iteration. Angular uses that variable as the
context for the interpolation in the double curly braces.
In this case, ngFor is displaying a list, but ngFor can
repeat items for any Iterable object.
@Component(directives: …)
Before you can use any Angular directives in a template,
you need to list them in the directives argument of your component’s
@Component annotation. You can list directives individually, or for
convenience you can use groups like CORE_DIRECTIVES:
lib/app_component.dart (directives)
import 'package:angular/angular.dart';

@Component(
  selector: 'my-app',
  // ···
  directives: [coreDirectives],
)
Refresh the browser. Now the heroes appear in an unordered list.

Creating a class for the data
The app’s code defines the data directly inside the component, which isn’t best practice. In a simple demo, however, it’s fine.
At the moment, the binding is to a list of strings. In real apps, most bindings are to more specialized objects.
To convert this binding to use specialized objects, turn the list
of hero names into a list of Hero objects. For that you’ll need a Hero class.
Create a new file in the lib folder called hero.dart with the following code:
lib/src/hero.dart
class Hero {
  final int id;
  String name;

  Hero(this.id, this.name);

  @override
  String toString() => '$id: $name';
}
You’ve defined a class with a constructor, two properties (id and name),
and a toString() method.
Using the Hero class
After importing the Hero class, the AppComponent.heroes property can return a typed list
of Hero objects:
lib/app_component.dart (heroes)
List<Hero> heroes = [
  Hero(1, 'Windstorm'),
  Hero(13, 'Bombasto'),
  Hero(15, 'Magneta'),
  Hero(20, 'Tornado')
];
Hero get myHero => heroes.first;
Next, update the template.
At the moment it displays the hero’s id and name.
Fix that to display only the hero’s name property.
lib/app_component.dart (template)
template: '''
  <h1>{{title}}</h1>
  <h2>My favorite hero is: {{myHero.name}}</h2>
  <p>Heroes:</p>
  <ul>
    <li *ngFor="let hero of heroes">
      {{ hero.name }}
    </li>
  </ul>
''',
The display looks the same, but the code is clearer.
Conditional display with NgIf
Sometimes an app needs to display a view or a portion of a view only under specific circumstances.
Let’s change the example to display a message if there are more than three heroes.
The Angular ngIf directive inserts or removes an element based on a boolean condition.
To see it in action, add the following paragraph at the bottom of the template:
lib/app_component.dart (message)
<p *ngIf="heroes.length > 3">There are many heroes!</p>Don’t forget the leading asterisk (*) in *ngIf. It is an essential part of the syntax.
Read more about ngIf and * in the ngIf section of the Template Syntax page.
The template expression inside the double quotes,
*ngIf="heros.length > 3", looks and behaves much like Dart.
When the component’s list of heroes has more than three items, Angular adds the paragraph
to the DOM and the message appears. If there are three or fewer items, Angular omits the
paragraph, so no message appears. For more information,
see the template expressions section of the
Template Syntax page.
Angular isn’t showing and hiding the message. It is adding and removing the paragraph element from the DOM. That improves performance, especially in larger projects when conditionally including or excluding big chunks of HTML with many data bindings.
Try it out. Because the list has four items, the message should appear.
Go back into app_component.dart and delete or comment out one of the elements from the hero list.
The browser should refresh automatically and the message should disappear.
Summary
Now you know how to use:
- Interpolation with double curly braces to display a component property.
- ngFor to display a list of items.
- A Dart class to shape the model data for your component and display properties of that model.
- ngIf to conditionally display a chunk of HTML based on a boolean expression.
Here’s the final code: