
Setup for Development 6.0
Setting up a new Angular project is straightforward using common Dart tools. This page leads you through getting and running the starter app that’s featured in this guide and tutorial.
Get prerequisites
For information on how to get the Dart SDK, see the Dart site:
- Dart SDK 2.10.0 or a compatible version. For AngularDart 7, SDK >= 2.17.0 is required.
- Your favorite IDE & code editor, such as WebStorm, Eclipse, or Visual Studio Code (recommended).
Install Command-line Tools
webdev
webdev is an official command-line tool for developing and deploying Dart web applications. You must install webdev to run AngularDart apps. To install it, open a terminal window and run the following command:
$ dart pub global activate webdev
If this is your first time interacting with Pub global packages, Dart will tell you (in the terminal) to add the system cache bin directory to your PATH environment variable (see this guide). For more info on using global packages, see Dart’s official docs about Pub.
ngdart_cli (recommended)
ngdart_cli is a community-maintained command-line tool for creating and managing AngularDart applications. AngularDart can still run without it, but ngdart_cli makes your life much easier by providing some handy commands such as ngdart create <project_name> to create a new project and ngdart clean to clean all build artifacts and cache, similar to flutter clean if you come from Flutter. For more info on ngdart_cli, see ngdart_cli’s Pub page.
Similar to webdev, run the following to install ngdart_cli:
$ dart pub global activate ngdart_cli
Note for Flutter developers
Occasionally, you might get some errors similar to the following when running webdev or ngdart:
Unhandled exception:
  ProcessException: 'pub' command not found
This is because additional Dart tools don’t exist in Flutter SDK’s bin directory. You’ll have to add the Dart SDK’s bin directory to your PATH environment variable. The Dart SDK is located at YOUR_FLUTTER_SDK_LOCATION/bin/cache/dart-sdk/bin/.
Create a starter project
For generic purposes, use ngdart create <app_name> to create a new AngularDart application.
If you want to follow the examples in this guide and tutorial, they are based on the angular-examples/quickstart GitHub project. You can get the project’s files by the following methods:
- Downloading them.
- Cloning the repo:
git clone https://github.com/angulardart-community/quickstart.git - Using VS Code’s Git support.
Get dependencies
$ dart pub get
Customize the project
-
Open
web/index.html, and replace the text of the<title>element with a title suitable for your app. For example:<title>Angular Tour of Heroes</title>. -
Open
pubspec.yaml, and update the description to suit your project. For example:description: Tour of Heroes. -
Optional. If you’d like to change your project’s name, then do a project-wide search-and-replace of the current value of the pubspec
nameentry (angular_app) with a name suitable for your app — usually it will be the same as the directory name you chose earlier.This project-global rename will touch:
pubspec.yaml,web/main.dartandtest/app_test.dart.
Run the app
Note: if you get errors like this below when building:
[SEVERE] Failed to precompile build_runner:build_runner:
[SEVERE] ../../../.pub-cache/hosted/pub.dartlang.org/analyzer-0.40.6/lib/src/error/best_practices_verifier.dart:258:50: Error: The property 'displayString' is defined in multiple extensions for 'TargetKind' and neither is more specific.
[SEVERE]  - 'TargetKind' is from 'package:meta/meta_meta.dart' ('../../../.pub-cache/hosted/pub.dartlang.org/meta-1.7.0/lib/meta_meta.dart').
[SEVERE] Try using an explicit extension application of the wanted extension or hiding unwanted extensions from scope.
[SEVERE]         var kindNames = kinds.map((kind) => kind.displayString).toList()
[SEVERE]                                                  ^^^^^^^^^^^^^
[SEVERE] ../../../.pub-cache/hosted/pub.dartlang.org/analyzer-0.40.6/lib/src/error/best_practices_verifier.dart:1917:14: Context: This is one of the extension members.
[SEVERE]   String get displayString {
[SEVERE]              ^^^^^^^^^^^^^
[SEVERE] ../../../.pub-cache/hosted/pub.dartlang.org/meta-1.7.0/lib/meta_meta.dart:91:14: Context: This is one of the extension members.
[SEVERE]   String get displayString {
[SEVERE]              ^^^^^^^^^^^^^
[SEVERE] ../../../.pub-cache/hosted/pub.dartlang.org/analyzer-0.40.6/lib/src/error/best_practices_verifier.dart:260:36: Error: The getter 'commaSeparatedWithOr' isn't defined for the class 'List<dynamic>'.
[SEVERE]  - 'List' is from 'dart:core'.
[SEVERE] Try correcting the name to the name of an existing getter, or defining a getter or field named 'commaSeparatedWithOr'.
[SEVERE]         var validKinds = kindNames.commaSeparatedWithOr;
[SEVERE]                                    ^^^^^^^^^^^^^^^^^^^^
Try adding meta: <1.7.0 to your dev_dependencies. This is caused by the package meta (specifically version 1.7.0), not AngularDart itself.
Visual Studio Code
Install the Dart VSCode extension. If you already have the Flutter VSCode extension installed, this is not necessary.
- Start VS Code.
- Press Ctrl+Shift+X (Windows/Linux) or Cmd+Shift+X (Mac) to open the Extensions side panel.
- Type
Dartin the extensions search field, and select Dart in the list, and click Install.
After that, usually you will do a one-time configuration for each project to set things up (you won’t need to do this if you use ngdart to create a new project):
- Press F5 or choose Run > Start Debugging.
- VSCode will prompt you to select an environment. Choose Dart & Flutter or simply Dart.
- After that, VSCode will create a
launch.jsonfile in the.vscodefolder that contains something like this:{ // Use IntelliSense to learn about possible attributes. // Hover to view descriptions of existing attributes. // For more information, visit: https://go.microsoft.com/fwlink/?linkid=830387 "version": "0.2.0", "configurations": [ { "name": "quickstart", "request": "launch", "type": "dart" } ] }Add the
"program": "web"value in “configurations”:{ // Use IntelliSense to learn about possible attributes. // Hover to view descriptions of existing attributes. // For more information, visit: https://go.microsoft.com/fwlink/?linkid=830387 "version": "0.2.0", "configurations": [ { "name": "quickstart", "request": "launch", "type": "dart", "program": "web" // ADD THIS LINE } ] }You’re now all set! You can close this file, and press F5 to start running your app!
The first build usually takes a few minutes, so sit back and grab a coffee while your app is building. Builds after that are much quicker because assets are cached on disk and Dart will execute incremental builds.
WebStorm
- In WebStorm, the Dart plugin comes in pre-installed. If you find yourself having no syntax highlighting for Dart files or if you’re using another IntelliJ-based IDE, installed the Dart plugin for IntelliJ.
- Open the project folder. On the top right of the screen, click the button Add Configuration… This will open up the “Run/Debug Configurations” window.
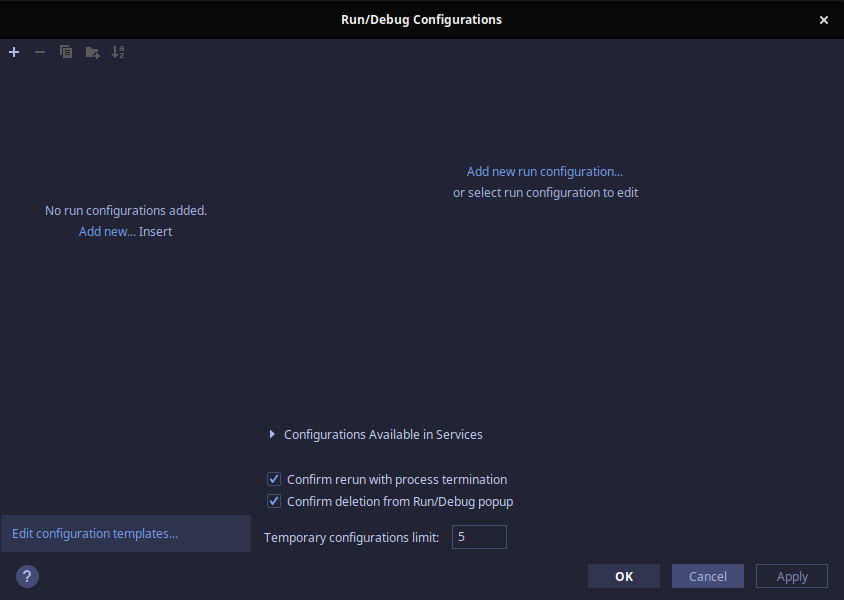
- Click on the plus sign on the top left or the Add new run configuration… on the middle right. In the drop-down list, choose Dart Web.
- WebStorm will tell you that “Path to HTML file is not specified”. In the “HTML File” field, choose the file
web/index.html. - You can also store the configuration file if you want by checking the Store as project file checkbox. WebStorm will remember your setup regardless.
You’re now all set! Close the configuration window, and press Shift + F10 or click on the green run button to run. The first build usually takes a few minutes, so sit back and grab a coffee while your app is building. Builds after that are much quicker because assets are cached on disk and Dart will execute incremental builds.
Command-Line
To run the app from the command line, use webdev to build and serve the app:
$ webdev serve
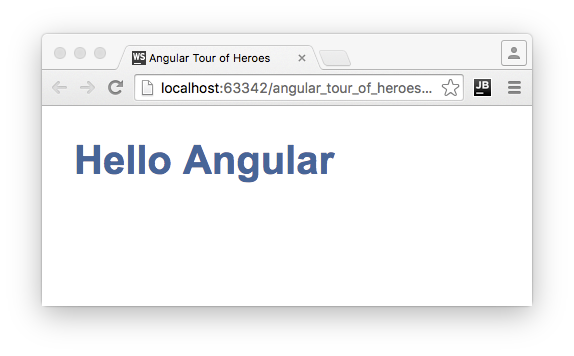
Then, to view your app, use the Chrome browser to visit localhost:8080. (Details about Dart’s browser support are in the FAQ.)
Result
Regardless of your method, you should see the following app in a browser window:
Reload the app
Whenever you change the app, reload the browser window. As you save updates to the code, the webdev tool automatically detects changes and serves the new app.
Next step
If you’re new to Angular, we recommend staying on the learning path. If you’d like to know more about the app you just created, see The Starter App.